共计 7440 个字符,预计需要花费 19 分钟才能阅读完成。
Recently, sovits 4.0 has been released, which further reduces VRAM consumption based on 3.0. As for whether 3.0 or 4.0 has better performance, there are also many comparison videos online, and opinions vary. This article introduces the complete process from data collection to training and inference based on the one-click package provided by https://www.bilibili.com/video/BV1H24y187Ko/. Note that sovits is a timbre transfer, it does not have singing skills itself, it just clones the timbre, and the final effect is also related to the original voice range. Do not use for illegal purposes.! I think it’s quite interesting to use it for AI singing, help you read scripts, finish foreign language oral assignments (haha), etc.
Data collection and processing
As an AI model, its training requires a large amount of data, so the first step is to obtain the data for training. If you are using someone else’s voice, you need to collect their audio materials, such as live broadcasts, songs, chat sounds, etc. The collected audio needs to be processed, retaining only the dry sound (the sound of only one person speaking). The specific method will be introduced later. The duration should be 1-2 hours. Compared to the quantity of data, the quality of the data has a greater impact, so data processing is necessary. Here, the method of processing your own voice will be introduced first because you can record in a relatively quiet environment to minimize noise.
I use the headphones that came with my microphone, which are average. There is a lot of background noise, so I use RTX Voice or NVIDIA BROADCAST for noise reduction. If you have an AMD graphics card, you can search for AMD Noise Suppression. My machine with a 3060 card does not respond with RTX Voice, so I will demonstrate using NVIDIA BROADCAST.
After the installation is completed, open the software.
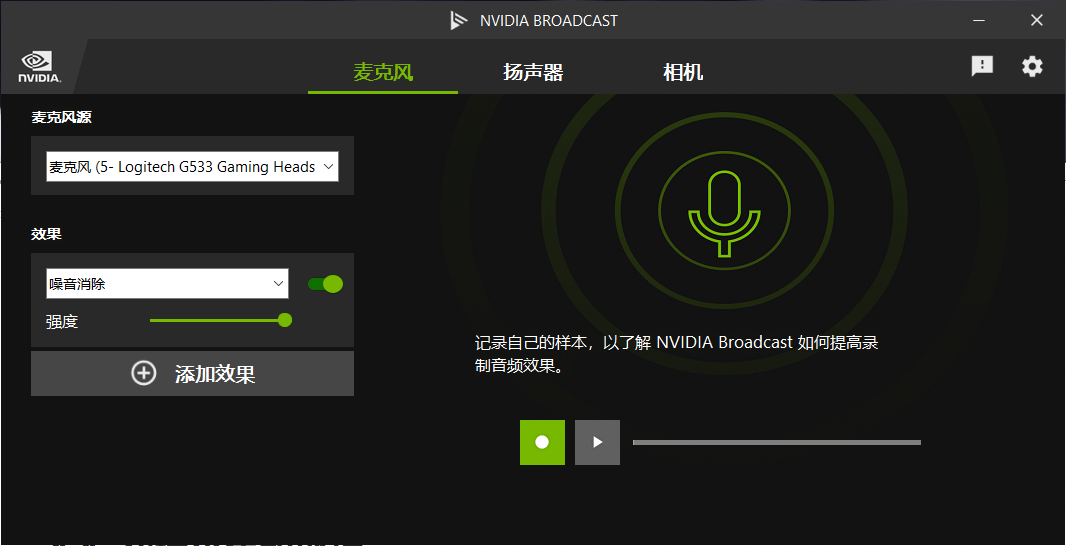
The microphone you use for the effect is the added processing effect in the effect. The green dot on the right side of the effect indicates whether the effect is enabled. Adding effects can increase more processing effects, and you can experience the processing effects in the green box on the right side of the recording. Personally, I feel it’s quite obvious.
Then in Sound-Recording, set NVIDIA BROADCAST as the default device.
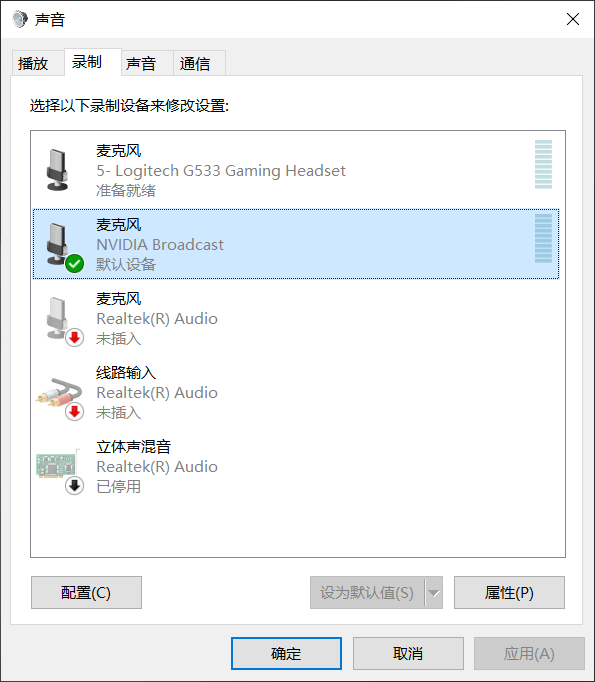
Then open the built-in voice recorder in Windows to start recording, if you use Remember to set the microphone input device to NVIDIA BROADCAST in the software settings of other recording software. After that, you can enjoy reading the text, and you can interrupt and record multiple times in between, as long as the total duration is sufficient.
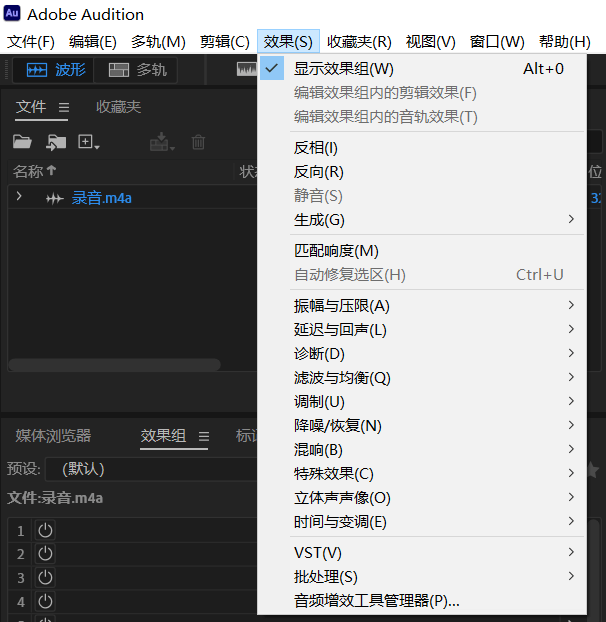
After obtaining the raw materials, you can choose to further process them (or not), such as Adobe Audition. The software installation package is provided in the video link at the beginning of the article. Open the recording file in Audition and apply the corresponding effect in Effects — Noise Reduction/Restoration.
After processing is complete, the next step is to divide the long raw material into small slices. The tool used here is Audio slicer, which is also provided in the one-click package.
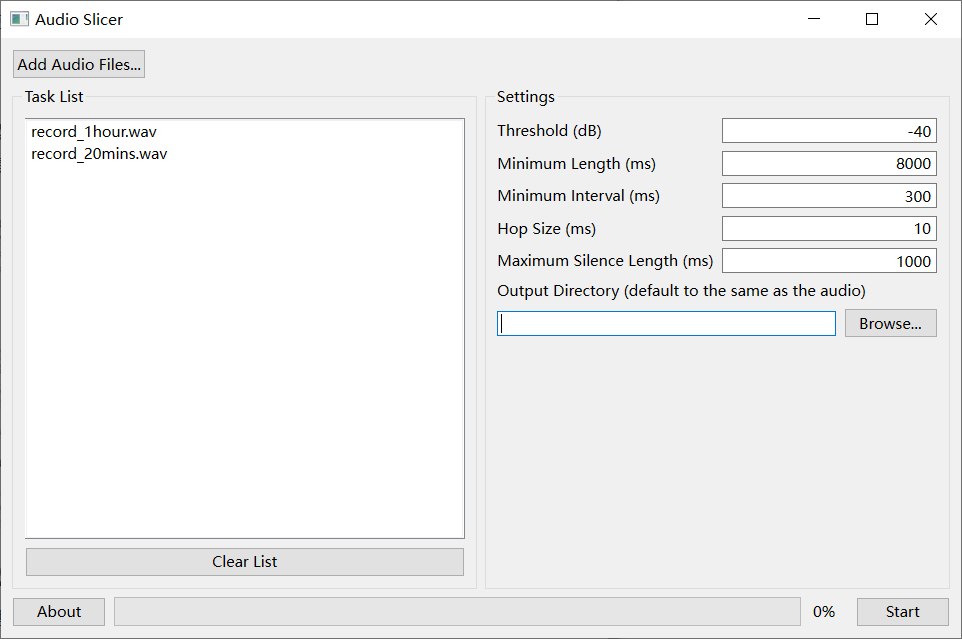
Drag the audio material into the left side or click the button to add it. On the right side, change the Minimum Length to 8000 and select a newly created folder with an English name as the Output Directory. Then click start and wait for it to finish.
After completion, copy the“sliced”folder to so-vits-svc-4.0\dataset_raw. Make sure the folder structure is so-vits-svc-4.0\dataset_raw\your folder name\your audio material, otherwise the next step will fail.
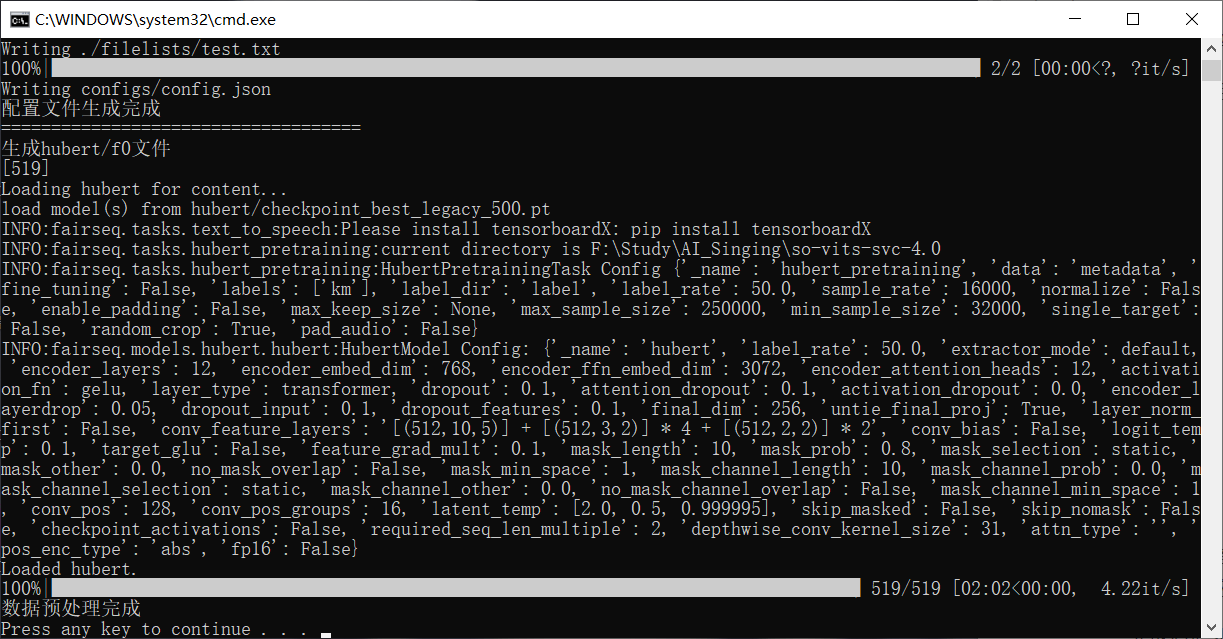
Then double-click on“Data Preprocessing.bat”in the so-vits-svc-4.0 directory, wait a moment, wait for the script to complete automatically, and after completion, it will be shown as follows. Press any key to exit.
Model configuration and training
Edit the config file: Right-click and open with a text editor \so-vits-svc-4.0\configs\config.json. The file contains the relevant parameters for training.
log_interval : Log print interval
eval_interval : Interval for saving the model
seed : Random number seed
epochs : Training upper limit
learning_rate : Learning rate, default value 0.0001, changes in pairs with batch_size
batch_size : The larger the value, the faster the training, but it consumes more video memory. Change it according to your configuration. The default value is 6. If you change it to 12, the learning rate should also be changed to 0.0002. If there is an error during training, it may be due to insufficient video memory and you need to lower it.
keep_ckpts : Number of saved models, each model is approximately 500+MB, the training process will save the latest keep_ckpts models, according to your needs and available space.
Double-click on“train.bat”in the root directory to start training. Wait for a while. If there is an error or if five decimal numbers grouped together as shown in the image below do not appear, return the content as is.

I encountered two situations:
- Check the error message. If the error message contains the word‘Data loader’, it means that your virtual memory may be insufficient. Try increasing the virtual memory or disabling multi-threading: open train.py, edit line 72
num_workers = 1. - Insufficient video memory, try lowering the‘Memory’setting.
The five numbers in the figure should be as small as possible, and there should be a trend of getting smaller with each iteration of training. After the prompt“Saving model and optimizer state at …..”, the latest model has been saved, and training can be terminated in advance. The next time the training script is run, it will continue training from the latest model. At this time, you can try inference to see the fitting effect of the model.
If you are an advanced player, you can try using tensorboard to view the training process and determine whether it should be terminated.
In the python environment with tensorboard installed, enter these in the terminal.
tensorboard --logdir your_own_directory\so-vits-svc-4.0\logs\44k

Open the address displayed by the browser afterwards, in my case it is localhost:6006.
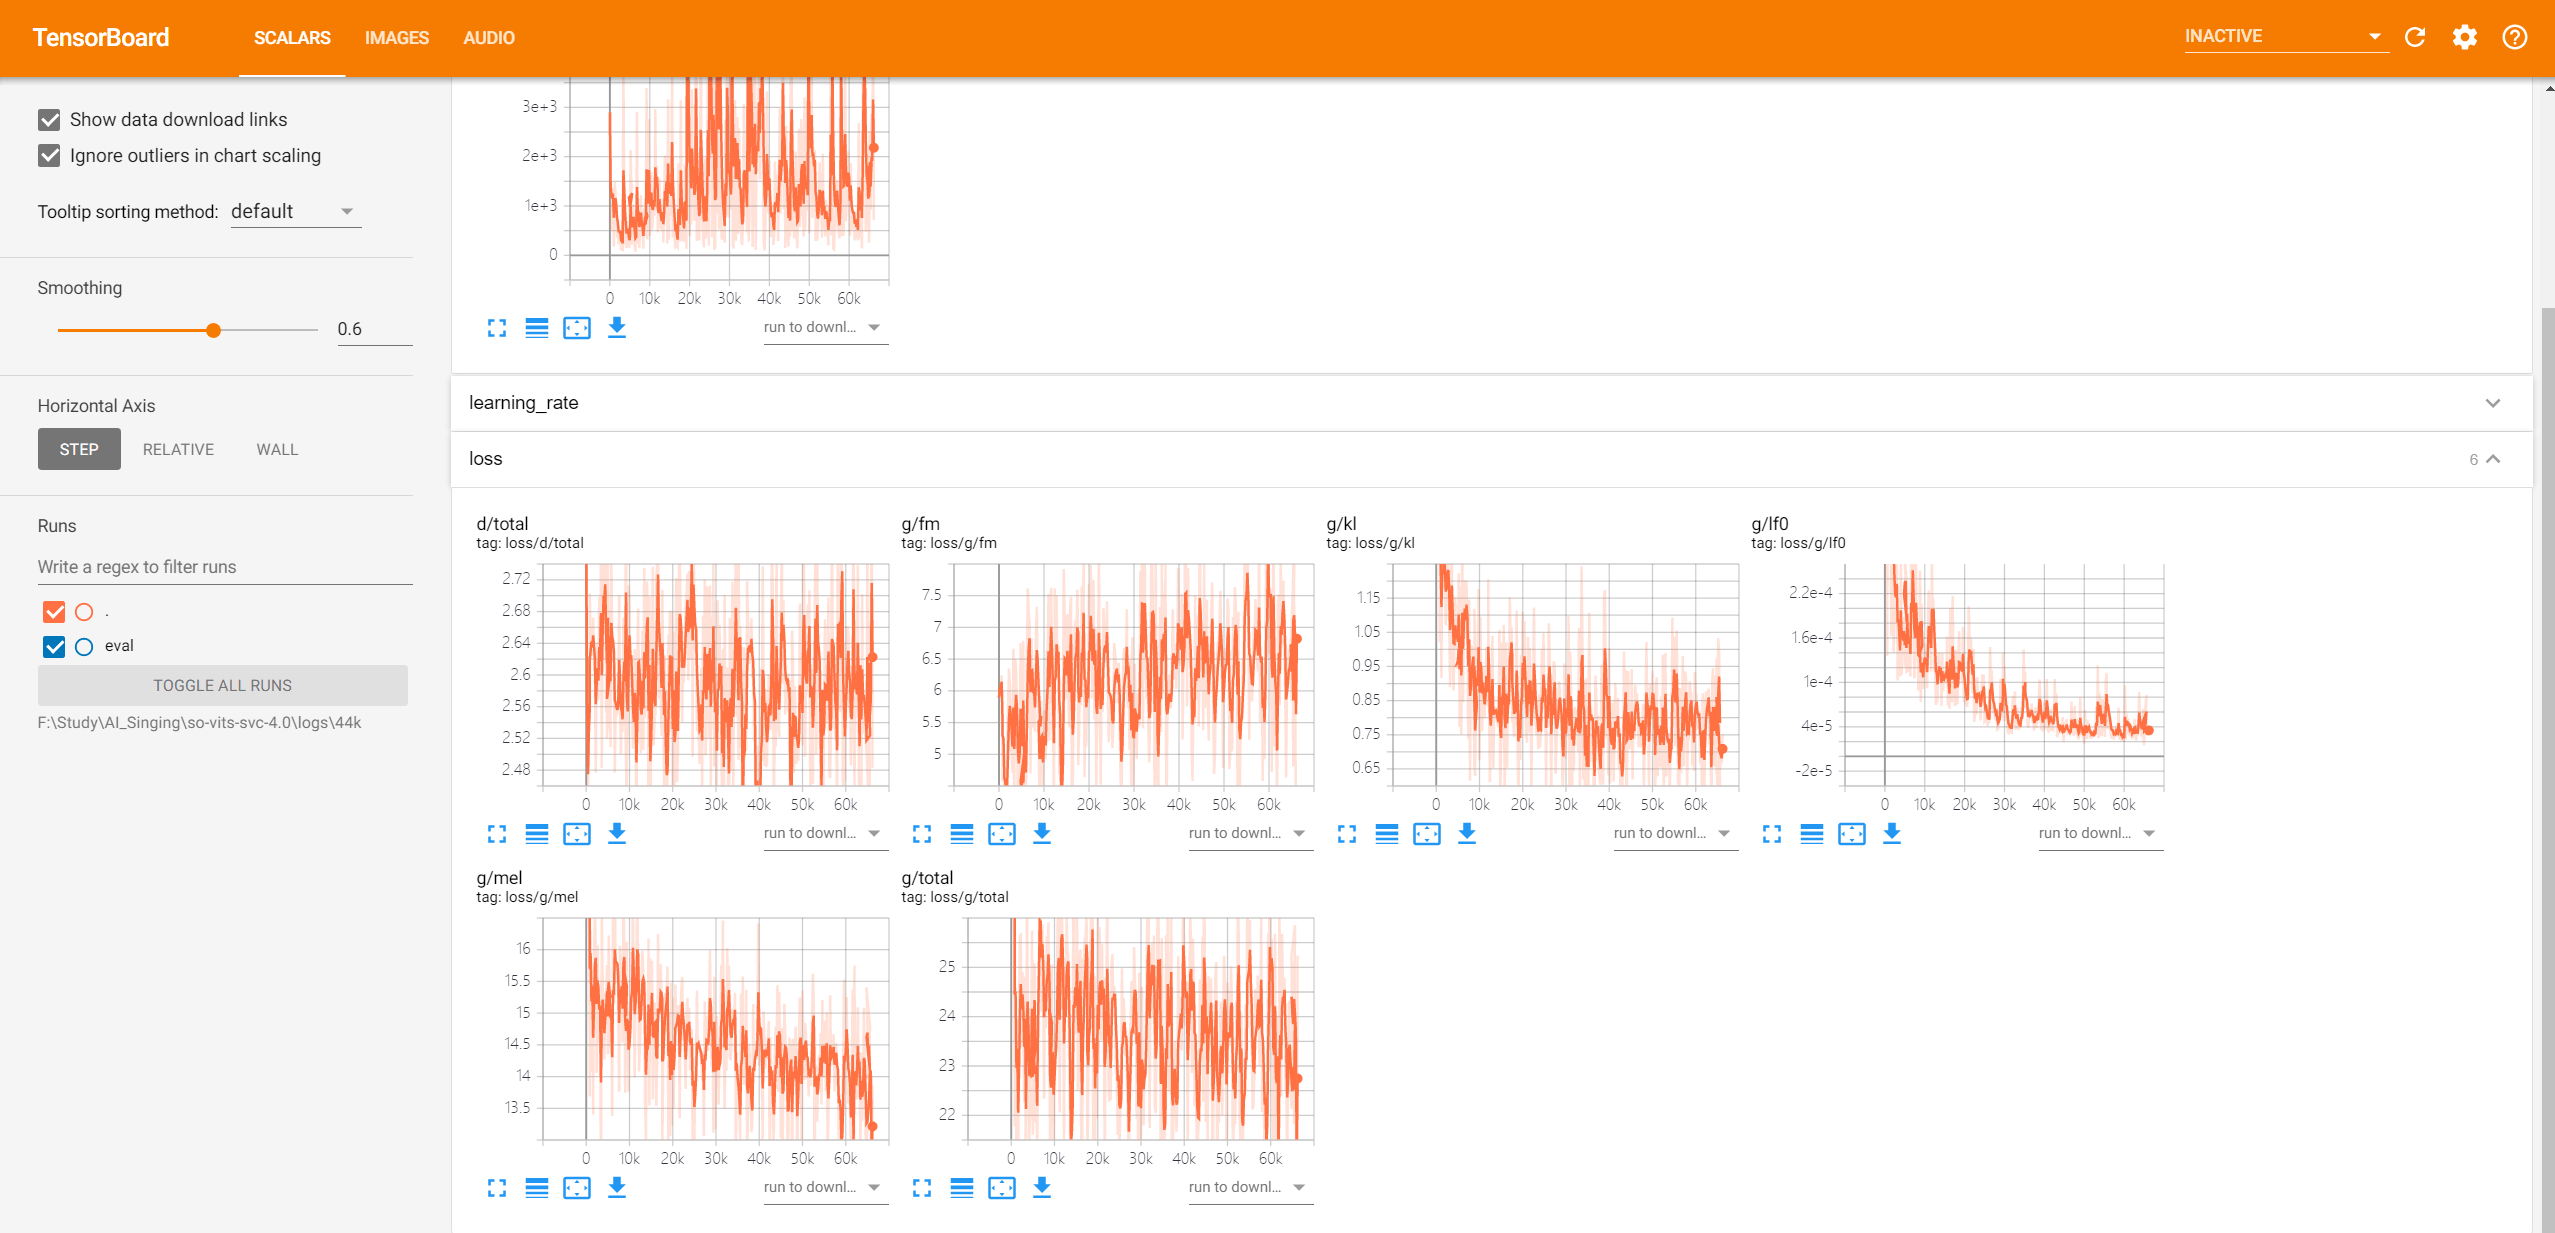
Click on the“loss”tab to see the trend of each loss. If there is an upward trend, the iteration should be stopped.
Voice clone
Just like the audio material used for training, it is also required that the sound is relatively pure and dry. If there are accompaniments or background vocals, it will affect the synthesis effect. Note that the format used for inference needs to be 16-bit. If you don’t want to pay attention to the format every time or encounter inference errors, you can install ffmpeg to solve this problem once and for all.
Download the corresponding version at http://ffmpeg.org and extract it locally. Then add the path to the system environment variables.
Open Settings — System — Advanced System Settings — Advanced tab — Edit Path in Environment Variables, add the bin folder of ffmpeg, such as F:\Program Files (x86)\ffmpeg-6.0-full_build\bin
If the purpose is to use one’s own or someone else’s voice to read scripts or similar, you need a tool to convert text into speech. There are many websites and tools available for this, but here I recommend Microsoft Speech Synthesis Assistant, which you can search for yourself. The synthesized speech is very clean and does not need further processing. If the resulting speech sounds robotic, it means that the model has not been trained well.
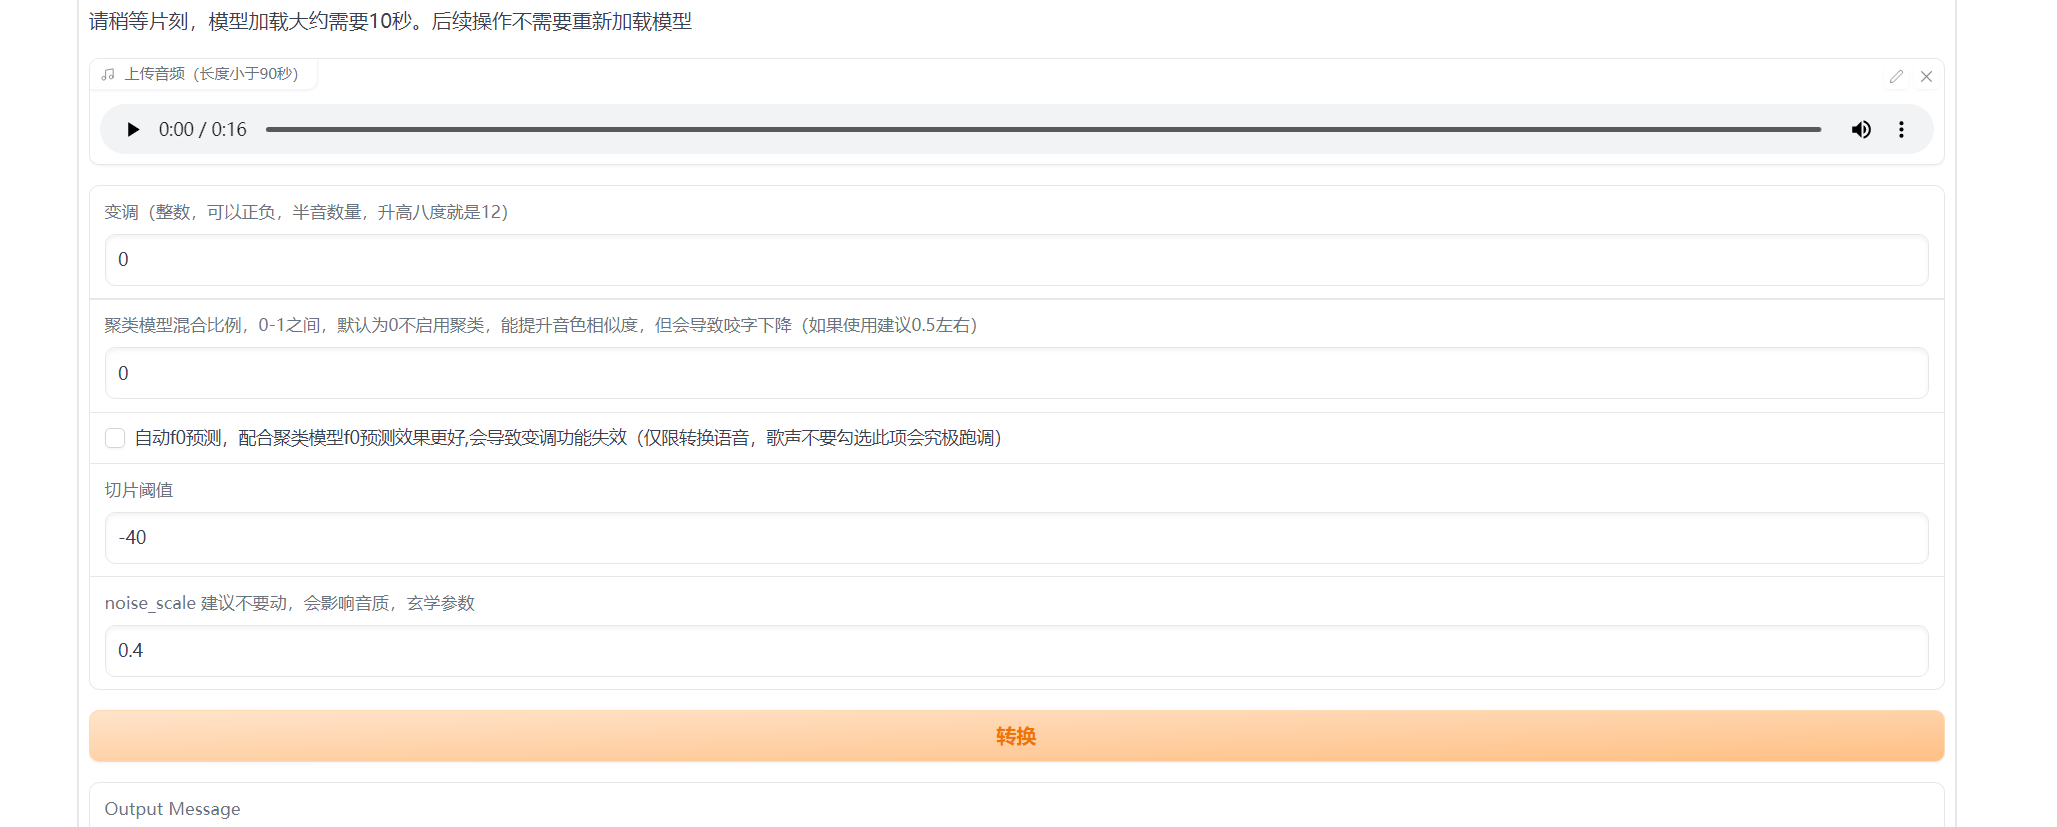
Run the script, wait a moment and open the prompted URL. If not modified config, it is http://127.0.0.1:7860.

Select the model you want to use. The model files are located under logs\44k. Here, you should choose a model starting with“G”as the ones starting with“D”are not for inference. Then, choose the configuration file and clustering model. If you haven’t trained a clustering model, don’t select it. The clustering model is used to improve the similarity of timbre. Click the“Load Model”button and wait for it to finish loading. Then, select the timbre and the preparation work is complete.
Upload the file that needs voice cloning, click the convert button to complete it. Listen to see how the effect is.
Finally, let’s talk about the extraction of vocals from a song and the separation of accompaniment. There are many tools to choose from, such as Ultimate Vocal Remover, RipX, etc. Among them, UVR is also included in the one-click package, and it is also an AI-based separation method with good results. It has built-in many models, so you can try it yourself.
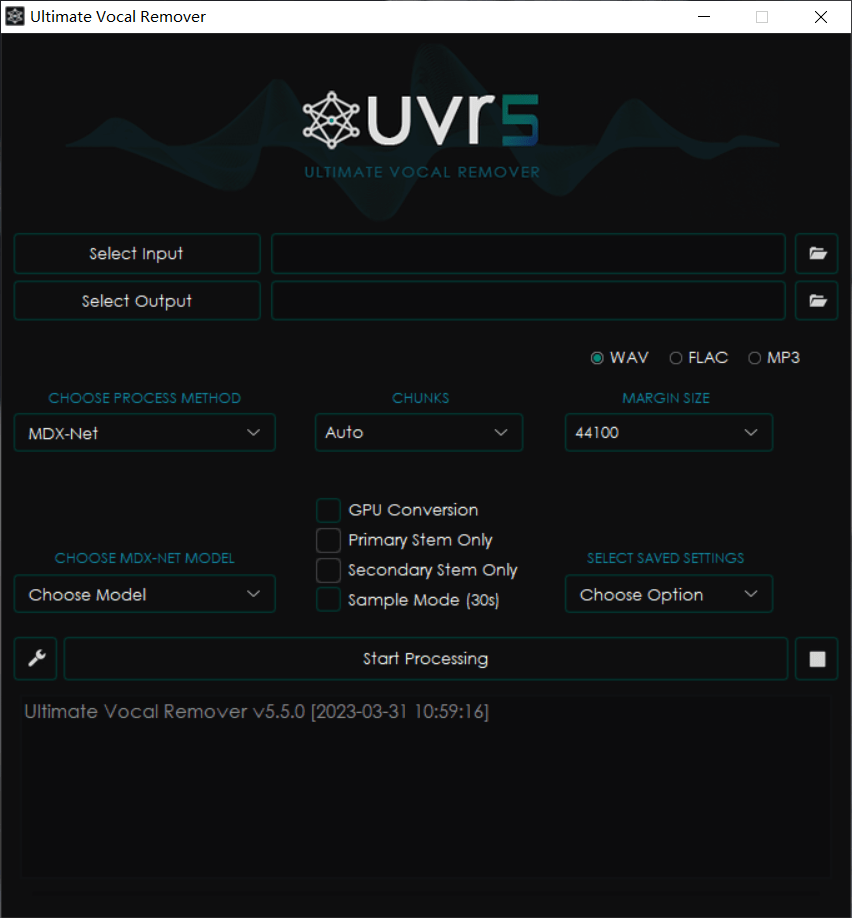
The two boxes above are for selecting the input file and the output save location; on the left side in the middle, choose the processing method, and on the right side are the parameters for the corresponding method. There are many tutorials online for specific usage, so I won’t say much here.
The general process is like this, I hope it can help you synthesize the voice and song you like.